I'm Still Alive!
Clearly I haven't gotten around to posting much, but I figured I'd try to get back in it. I've done a TON of work on the house since we bought it 6 years ago, and a lot in the past nearly two years since I made the first blog post. I'm working on writing up pages on some of the major work I've done, including some step-by-step processes for common restoration work, like restoring windows, wood siding, etc. Those are going to take me a lot longer to write up, so in the meantime, I figured I'd start doing some shorter posts. These will probably be a bit random, but hopefully you find them interesting.Backyard Lights
Back when we bought the house, there was a crudely-mounted two-bulb motion-activated floodlight on the back of the house. It was installed using EMT conduit and set-screw connectors (not outdoor-rated), a standard steel octagon box (also not outdoor-rated), and wired directly into the panel, so there was no manual override control. Oh, it also looked pretty tacky slapped on the back of the house. I don't have a good photo of it from way back then, but here's one from last spring when it was still up, but the driveway and other projects had been completed.
When we started on the house, I knew this was going to need to go, so I wired up an empty switch in the entry mudroom off the back door, and ran a 14-3 conductor back to an empty box in the basement so I'd have an available switch later, without having to cut open walls and repair plaster again.
Two years ago when I did the garage, I decided that the wall lanterns on the garage would be much more useful tied into a 3-way switch circuit with switches in both the garage and house, so I buried an extra conduit when running power for the garage subpanel, and wired it up with the switch I'd originally put in the mudroom. Here are a couple photos of the conduit during installation.


This worked great, and the two lanterns on the front with 150w bulbs, and one at the side entry door with a 100w bulb illuminated the garage and driveway well, it still left the entry to the backdoor on the house rather dim.

Motion Sensor
The motion sensor was relatively straightfoward. I just had to cut a hole and mount a box in the soffit of the garage (where it can view the driveway and back patio), and pull a 14-3 NM cable to the switch box in the garage where it ties into the original circuit. I was a big hesitant to add a somewhat ugly motion sensor to my recently-restored garage soffit, but decided the visual sacrifice was worth it, and it's not as obtrusive as I'd feared. I may get around to painting it white to subdue it further.
House Lantern
Indoor Work
Although I'd pulled an extra neutral with the 3-way travelers from the garage to the house back when I wired up the switches, I did not pull an extra hot, which was now necessary to allow the motion sensor and 3-way switches to fully operate all lights on the circuit. To save borrowing a fish tape long enough again, I was able to use the existing wires to pull a small rope back through the conduit, add the new hot to the bundle, and pull them all back through again. The most work then was running NM cable through the mudroom wall to reach the back wall to power the lantern. To minimize plaster work, I removed the baseboards on the affected walls, and was able to work entirely in that area, even avoiding painting, which allowed me to complete this phase in a record two workday evenings! I'll skip the gnarly details and 2ft long drillbits to get through to the correct location in the basement, but here are a few highlight photos: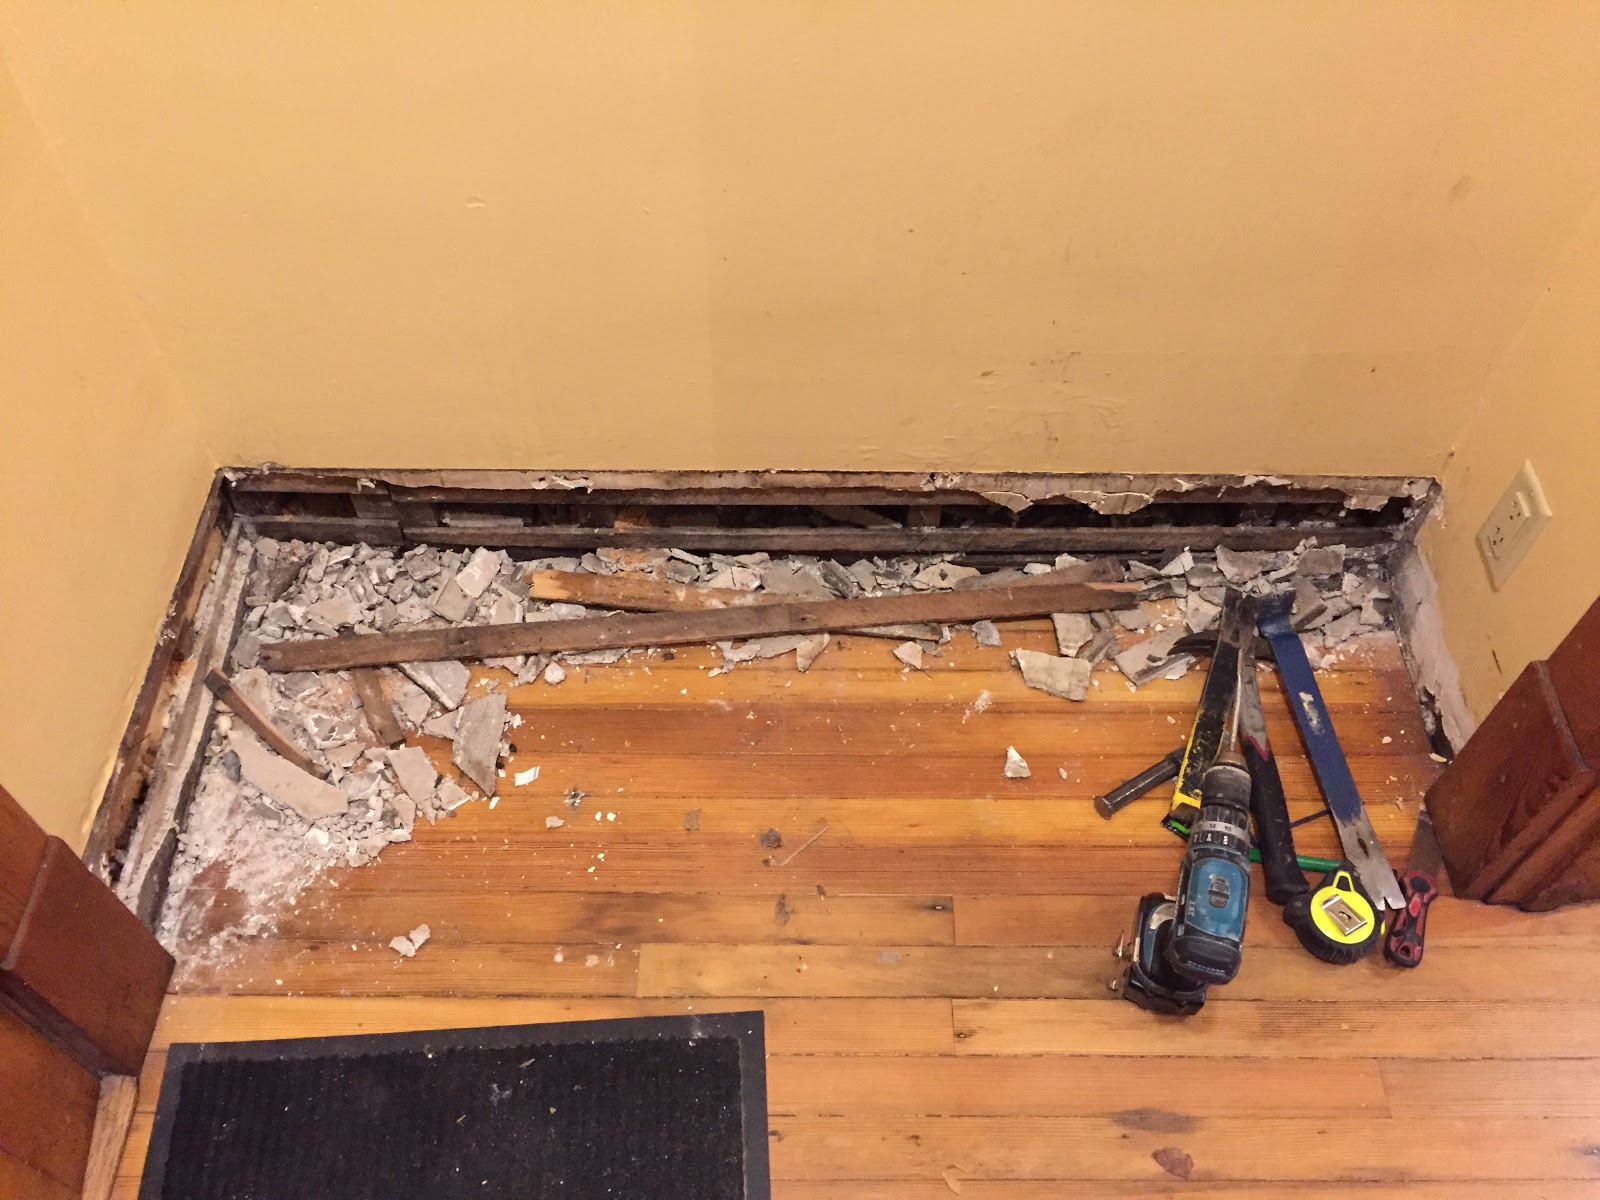


Outdoor Work
On the outside, I repeated a similar detail I've used elsewhere for penetrations through the siding. I use a 5/4 trim block, topped with a drip cap to provide a durable, weathertight, and attractive mounting base for the light. The drip cap was probably overkill for this location, but I like maintaining the consistent detailing that matches the original window trim. It also provides proper drainage planes, and ties in with the original siding well. The top of the drip cap slips up behind the top siding board, and groove at the bottom laps over the bottom siding board. I usually tweak the dimensions or location of the penetrations to line up with existing siding laps when possible for a neater look and easier fit-up. It's all made out of western red cedar, which is the cheapest naturally rot-resistant wood I've found. The 5/4 board is cedar decking, and the drip cap is some leftover material I made out of 2x4s on the table saw for previous work. Here's what it looks like (I always pre-prime my new exterior siding and trim work):


Cutting the opening for the new mounting block on the house was pretty straightfoward, and just required a bit of careful work to cut the top removed clapboard out from under the remaining board at the top of the new block:


The Final Reveal!
After all the the tedious and dirty work, I put two coats of white trim on the new block, and touched up the blue siding, and it was time to mount the light and test it out. I think it came out good, and my wife loves the better lighting coming and going in these dark fall evenings now. Here it is!


Alright, well, that's all four now. Hopefully I'll be able to keep up a bit better, and it won't be nearly 2 years before my next post!
In case you want some teasers, here are a few of the big how-to posts I'm working on:
- Wood window restoration
- Wood siding and trim restoration and repair
- Interior cornice moulding fabrication
- Leaded glass construction
No comments:
Post a Comment